Signing applications is a requirement for deploying a desktop or mobile application and can be fiddly. Microsoft’s Azure Artifact Signing always looked to me like a good solution in that the pricing is reasonable at $9.99 per month for up to 5,000 signings, and it is run by Microsoft so one would think that the certificates will be satisfactory for Windows users.
This week I got started with the service. Microsoft has a handy quickstart guide and the first thing to note is that availability is limited to USA and Canada for individual developers, or USA, Canada, EU and UK for organizations. Luckily I work for a small UK limited company so qualify as an organization.
I also noted that a pay as you go Azure subscription is required; if you have a sponsored subscription that will not work.
The first step is to create an Artifact Signing Account. Billing starts from when this account is created, even if you are unsuccessful in obtaining a signing certificate. Should this be the case, make sure to delete the account.
Next, check the roles assigned to the user that will operate the code signing. There are two: Artifact Signing Identity Verifier and Artifact Signing Certificate Profile Signer. I assigned them both to my Entra ID user.
Now there are two steps to obtaining a certificate profile. The first is Identity Validation. In my case this is for an organization; you will need a DUNS number, two valid email addresses, a functioning web site, and the first and last name of the individual that will use the service. The organization address should match the one recorded at Companies House, even if day to day work is done elsewhere.
The organization identity verification automatically progresses to individual identity verification. In my case this was done by a company called AU10TIX and I was able to use a UK driving licence.
Next I hit what looked like a roadblock. I received an email asking me to verify my email address; however clicking the link got me a web page stating “the request is blocked” and “service unavailable”. Thinking that perhaps the service was unavailable, I tried several times and on different networks. I am not the first to experience this. I was on the point of raising a support case when I got a further email advising that validation was complete.
Once identity validation is complete you can create a certificate profile. The type I need is called Public Trust. I had several mysterious failures with uninformative errors; I suspect this might be to do with non-unique profile names but no idea really. Again I was on the point of contacting support when I tried a new profile name and it worked.
The quickstart guide ends at this point and the next document you need is the one on setting up signing integrations. You will need a recent Windows SDK including SignTool.exe, the .NET 8.0 runtime, and the Azure Artifact Signing client tools, if like me you want to sign a Windows executable.
Then you need to create a JSON file traditionally called metadata.json, and a command to sign the file. The command will be lengthy so fire up Notepad or similar and put it in a .cmd file or similar. You need to discover the location of SignTool and the location of Azure.CodeSigning.Dlib.dll and note that there are different x64 and x86 versions.
The command includes a timestamp without which the code signing is useless as the certificate has a lifetime of just three days.
I carefully assembled the command and I am happy to report that it worked first time.
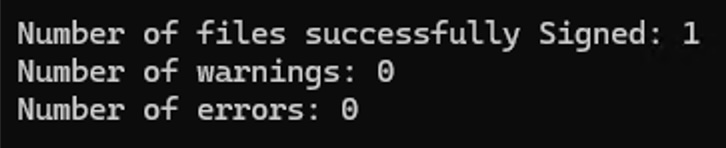
So far so good. The whole process is somewhat intricate but I am hoping this will prove a good solution for Windows.